Welcome to the realm of Cat6 cable installation – a world where connectivity meets craftsmanship.
In the age of lightning-fast data and uninterrupted communication, the art of installing Cat6 cables is a skill that goes beyond the technicalities.
It’s about sculpting networks that seamlessly carry information, ensuring a symphony of connectivity in every wire.
Whether you’re a seasoned technician or a curious DIY cabling enthusiast, this journey will equip you with the knowledge to transform a routine installation task into a masterpiece of precision and reliability.
Microlink as being an experienced Cat6 Cable KSA installation expert will take you through the benefits, features, process, and step-by-step guide in this blog.
So, read on and enhance your knowledge from our professional installation experience in the Kingdom of Saudi Arabia.
Understanding Cat6 Cable: Features and Benefits
Imagine a cable that not only connects devices but does so with finesse and efficiency. That’s the magic of Cat6 cables.
From enhanced bandwidth to reduced interference, Cat6 cables are designed to meet the demands of modern networking.
Uncover the technological marvels and wiring techniques that make Microlink and Cat6 a preferred choice for those who seek not just connectivity but a superior and future-ready network infrastructure.
By understanding the intricacies of Cat6 cables, you’re not just installing wires; you’re setting the stage for a performance where each connection is a star.
Get ready to explore the artistry behind Cat6 cable installation and elevate your network connectivity to a whole new level.
Essential Tools and Equipment for Mastering Cat6 Cable Installation
Embarking on the journey of Cat6 cable installation requires more than just a roll of cable and a wish for a strong connection. To truly master this art, you need the right tools and equipment—your trusted allies in crafting a network that stands the test of speed and reliability. Here’s a guide to the essential tools that will transform your Cat6 cable installation from a routine task into a seamless masterpiece.
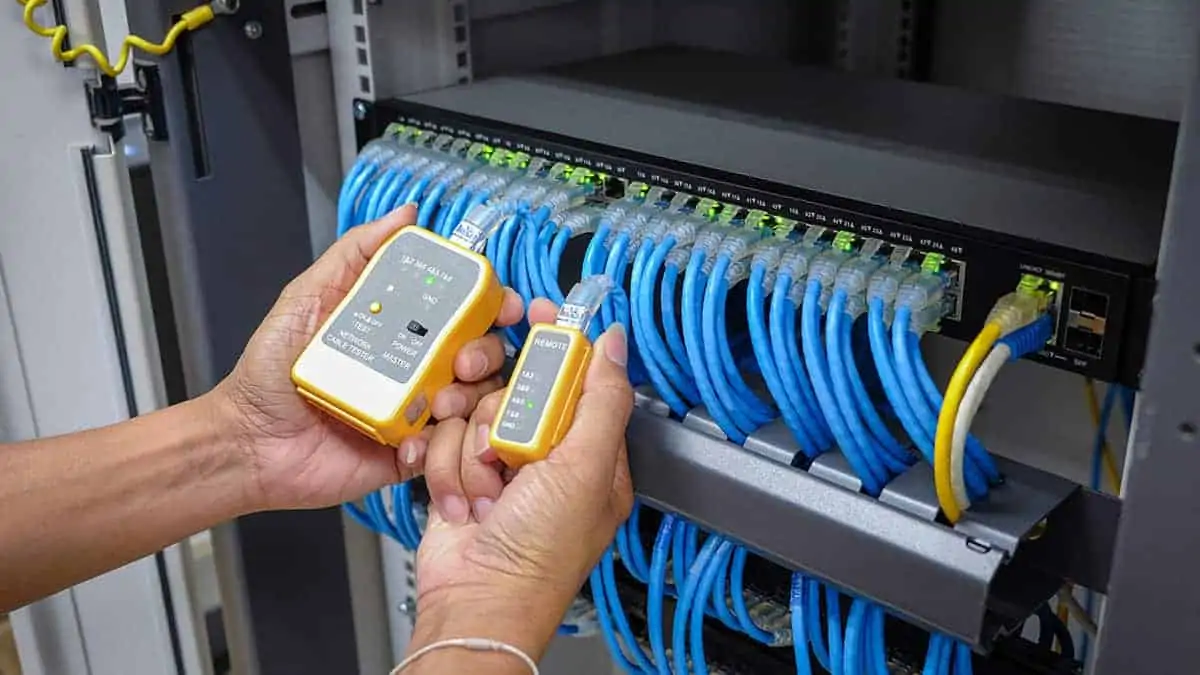
1. Cable Tester: The Maestro’s Baton
Before you begin your symphony of connectivity, ensure you have a cable tester to orchestrate the performance. A cable tester is your maestro’s baton, allowing you to confirm that each note (or wire) plays perfectly. It ensures your connections are solid, preventing potential issues down the line.
2. Crimping Tool: The Sculptor’s Chisel
Crafting precise connections is an art, and a crimping tool is your sculptor’s chisel. This essential tool is vital for attaching connectors to the ends of your Cat6 cables. Invest in a high-quality crimping tool to carve out connections that are not just functional but pieces of art in themselves.
3. Cable Strippers: Precision Clippers
Every artist needs precision tools, and cable strippers are your precision clippers. Stripping away the excess insulation with accuracy ensures a clean and efficient connection. Look for adjustable cable strippers to tailor them to the needs of your specific Cat6 cables.
4. Punch Down Tool: The Composer’s Pen
When it comes to terminating cables on patch panels or keystone jacks, a punch down tool is your composer’s pen. This tool neatly secures the wires into their designated slots, creating a composition of connectivity. Choose a punch down tool with interchangeable blades for versatility.
5. Fish Tape: The Navigator’s Compass
Navigating cables through walls, conduits, or tight spaces is an essential part of the installation process. A fish tape acts as your navigator’s compass, helping you thread the cable through challenging routes. This tool ensures your cables are gracefully guided to their destination.
6. Labeling Tools: The Librarian’s Index
Maintaining an organized network is as crucial as creating it. Labeling tools, akin to a librarian’s index, keep track of your cables and connections. Invest in cable labels and a label printer to create a system that makes future troubleshooting and maintenance a breeze.
7. Cable Management: The Gallery Frame
No masterpiece is complete without an elegant frame. Cable management tools, such as cable ties, clips, and organizers, act as the gallery frame for your installation. They keep cables neat, organized, and visually appealing, preventing a tangled mess.
Step-by-Step Guide to Mastering Cat6 Cable Installation
Embarking on the journey of Cat6 cable installation can be a rewarding experience when approached with precision and care.
This brief guide of Cat6 Cable KSA installation will take you through the complete procedure, guaranteeing that your connection is not just a simple installation but a work of art in the dominion of networking.
Step 1: Collect Your Tools and Materials
Before starting the installation process, guarantee you have all the essential tools and materials at hand. This includes Cat6 cables, cable tester, crimping tool, cable strippers, and punch down tool, fish tape, labeling tools, and cable management accessories.
Step 2: Plan Your Network Layout
Map out the path your cables will take, considering the locations of devices, outlets, and any potential obstacles. Planning helps you avoid unnecessary bends and ensures a clean, efficient installation.
Step 3: Measure and Cut the Cat6 Cable
Measure the required length of Cat6 cable, adding a little extra for flexibility. Use cable cutters to make clean, straight cuts, ensuring accuracy in your connections.
Step 4: Strip and Prepare the Cable Ends
Use cable strippers to carefully remove the outer from both ends of the cable. Inside, you’ll find twisted pairs of wires. Untwist and straighten these pairs while maintaining the proper twist ratio.
Step 5: Terminate the Wires
Insert the prepared wires into the RJ45 connector according to the color-coding standard (T568A or T568B). A crimping tool will secure the wires into the connector, creating a solid and reliable connection.
Step 6: Test the Cable Connections
Before installing the cables, use a cable tester to ensure each connection is functioning correctly. This step helps identify and rectify any issues before the cables are integrated into the network.
Step 7: Route the Cables
Using a fish tape or cable snake, carefully route the cables through walls, conduits, or any designated paths. Ensure gentle bends to avoid damage to the cables and maintain optimal performance.
Step 8: Terminate Cables on Patch Panels or Keystone Jacks
If you’re connecting the cables to a patch panel or keystone jacks, use a punch down tool to secure the wires into the appropriate slots. Follow the wiring standard consistently for a uniform installation.
Step 9: Label and Document Connections
Label each cable at both ends for easy identification during future maintenance or troubleshooting. Create a documentation system to keep track of each connection point.
Step 10: Implement Cable Management
Secure cables with cable ties, clips, or organizers to maintain a tidy and organized appearance. Proper cable management not only improves aesthetics but also facilitates future maintenance.
Testing and Quality Assurance in Cat6 Cable Installation
Testing and quality assurance are paramount in Cat6 cable installation. Utilize cable testers to verify each connection’s integrity, ensuring optimal performance.
Rigorous testing guarantees that the installed cables meet industry standards, reducing the risk of signal degradation or network issues.
Prioritize quality assurance to achieve a reliable and efficient Cat6 cable infrastructure.
Troubleshooting Common Issues in Cat6 Cable Installation
Encounter and resolve common issues with finesse in Cat6 cable installation. Address connectivity problems, signal issues, or improper terminations through systematic troubleshooting.
Utilize cable testers and diagnostic tools to identify and rectify challenges swiftly, ensuring a seamless and reliable network. Master the art of troubleshooting for a flawless Cat6 cable installation.